Top Ad 728x90

Friday, September 11, 2026

Garlic Butter Steak Bites & Creamy Parmesan Shells

by


If you’re looking for a quick, satisfying meal that combines tender steak bites with creamy, cheesy shells, this Garlic Butter Steak Bites & Creamy Parmesan Shells recipe is your answer! With its rich garlic butter sauce and perfectly cooked pasta, this dish delivers layers of flavor in every bite. Perfect for date nights, family dinners, or simply treating yourself, it’s easy to make and sure to become a favorite.

In this article, we’ll guide you step-by-step through making this delightful dish, share tips for success, and provide ideas for customization. Let’s dive in!


Why This Recipe Stands Out

Before diving into the details, here’s why this Garlic Butter Steak Bites & Creamy Parmesan Shells deserves a spot on your table:

  1. Tender Steak Bites : Bite-sized pieces of sirloin steak are seared to perfection in a garlicky butter sauce.
  2. Creamy Parmesan Shells : Cooked pasta shells tossed in a luscious cheese sauce create a comforting base.
  3. Quick and Easy : Ready in under 30 minutes with simple prep work.
  4. Versatile : Customize it with herbs, spices, or veggies to suit your taste.

Now let’s explore the ingredients and instructions in detail.


Ingredients You’ll Need

For the Steak Bites:

  • 1 lb sirloin steak , cut into bite-sized pieces
    (Sirloin is lean yet flavorful, perfect for quick cooking.)
  • 3 tbsp butter
    (Creates a rich, velvety sauce while browning the steak.)
  • 1 tbsp olive oil
    (Prevents sticking and adds depth to the pan-searing process.)
  • 3 cloves garlic , minced
    (Enhances aroma and savory notes.)
  • 1 tsp Worcestershire sauce
    (Brings umami richness to the dish.)
  • 1 tsp Italian seasoning
    (Infuses herbs like basil, oregano, and thyme for added complexity.)
  • ½ tsp smoked paprika
    (Adds smoky depth and vibrant color.)

For the Creamy Parmesan Shells:

  • 8 oz pasta shells (e.g., conchiglie)
    (Holds the creamy sauce beautifully.)
  • 2 cups grated Parmesan cheese
    (Forms the base of the luxurious sauce.)
  • 1 cup heavy cream
    (Keeps the sauce light and creamy without being overly heavy.)
  • 2 tbsp butter
    (Richens the sauce and enhances flavor.)
  • Salt and pepper , to taste
    (Adjust seasoning based on preference.)

Step-by-Step Instructions

Step 1: Prepare the Pasta Shells

  1. Bring a large pot of salted water to a boil. Add the pasta shells and cook according to package instructions until al dente.
  2. Drain the pasta and set aside while you prepare the steak bites.

Step 2: Sear the Steak Bites

  1. Heat the olive oil and 3 tbsp butter in a large skillet over medium-high heat until the butter melts and begins to foam.
  2. Add the bite-sized sirloin steak to the skillet and cook for 2–3 minutes per side , or until browned and cooked to your desired doneness. Remove the steak from the skillet and set aside.

Step 3: Make the Garlic Butter Sauce

  1. In the same skillet, reduce the heat to medium and add the minced garlic , stirring constantly for 1 minute to prevent burning.
  2. Stir in the Worcestershire sauce , Italian seasoning , and smoked paprika , allowing the flavors to meld together.

Step 4: Create the Creamy Parmesan Sauce

  1. Return the skillet to low heat and add the 2 tbsp butter . Once melted, gradually whisk in the heavy cream until smooth.
  2. Add the grated Parmesan cheese , stirring continuously until the sauce thickens slightly and becomes glossy.

Step 5: Combine Everything

  1. Toss the drained pasta shells into the creamy Parmesan sauce, ensuring they’re evenly coated.
  2. Add the seared steak bites back to the skillet, gently folding them into the pasta mixture so they absorb some of the sauce.

Step 6: Serve and Enjoy!

Divide the Garlic Butter Steak Bites & Creamy Parmesan Shells among plates or bowls. Garnish with fresh parsley or additional Parmesan cheese if desired. Pair with a side salad or crusty bread for a complete meal.


Tips for Success

  • Don’t Overcook the Steak : Cooking the steak bites quickly ensures they remain juicy and tender.
  • Use Fresh Garlic : Freshly minced garlic provides superior flavor compared to pre-minced varieties.
  • Grate Your Own Cheese : Freshly grated Parmesan melts better and has superior flavor compared to pre-shredded options.
  • Adjust Seasoning : Taste the sauce after combining all ingredients and adjust with salt, pepper, or extra herbs as needed.

Variations and Customizations

While the classic version is delicious, feel free to switch things up with these ideas:

  • Spicy Twist : Add red pepper flakes or diced jalapeños to the garlic butter sauce for heat.
  • Veggie-Packed Option : Stir in sautéed mushrooms, spinach, or bell peppers for added nutrients.
  • Cheesy Extravaganza : Mix in shredded mozzarella or cheddar for extra gooeyness.
  • Protein Boost : Substitute the sirloin steak with chicken, shrimp, or tofu for variety.

Serving Suggestions

This Garlic Butter Steak Bites & Creamy Parmesan Shells pairs wonderfully with a variety of sides and drinks:

  • Serve alongside garlic bread or dinner rolls for soaking up the creamy sauce.
  • Offer it as part of a family-style dinner with roasted vegetables or Caesar salad.
  • Pair with red wine, sparkling water, or lemonade for refreshment.
  • Freeze portions for later use—simply thaw and reheat when ready.

FAQs About Garlic Butter Steak Bites & Creamy Parmesan Shells

Q: Can I use another type of pasta?

A: Yes! Any short pasta shape works well, such as penne, fusilli, or ziti. Just adjust cooking time accordingly.

Q: What if I don’t have heavy cream?

A: Substitute with half-and-half or whole milk mixed with a tablespoon of butter for similar results.

Q: How long does this dish stay fresh?

A: Store leftovers in an airtight container in the refrigerator for up to 3–4 days . Reheat gently on the stovetop or microwave, adding a splash of milk to restore creaminess.


Health Benefits of This Dish

While indulgent, there are ways to make this dish slightly healthier without sacrificing taste:

  1. Lean Protein : Sirloin steak is lower in fat compared to other cuts, making it a good protein source.
  2. Nutrient-Rich Parmesan : Packed with calcium and protein, Parmesan boosts the nutritional value of the dish.
  3. Portion Control : Enjoy one serving per person to savor the flavors while keeping portions reasonable.

Conclusion

This Garlic Butter Steak Bites & Creamy Parmesan Shells brings together the best of hearty proteins and creamy sauces in one irresistible package. By following our detailed recipe and expert tips, you’ll be able to create a dish that rivals anything from a restaurant—all in just one pan

My sister begs me to fry these

by


Fried green tomatoes are a Southern classic that make perfect sense the moment those first firm, tart tomatoes show up in late spring. This version keeps faith with the tradition but strips it down to just four essential ingredients: green tomatoes, buttermilk, seasoned cornmeal, and oil. The result is a shatteringly crisp, golden crust wrapped around a bright, tangy slice of tomato—the kind of snack my sister starts asking for as soon as she sees green tomatoes at the market.

With no extra fuss, you get that iconic Southern crunch and flavor, ideal for home cooks who want maximum payoff from minimal effort.

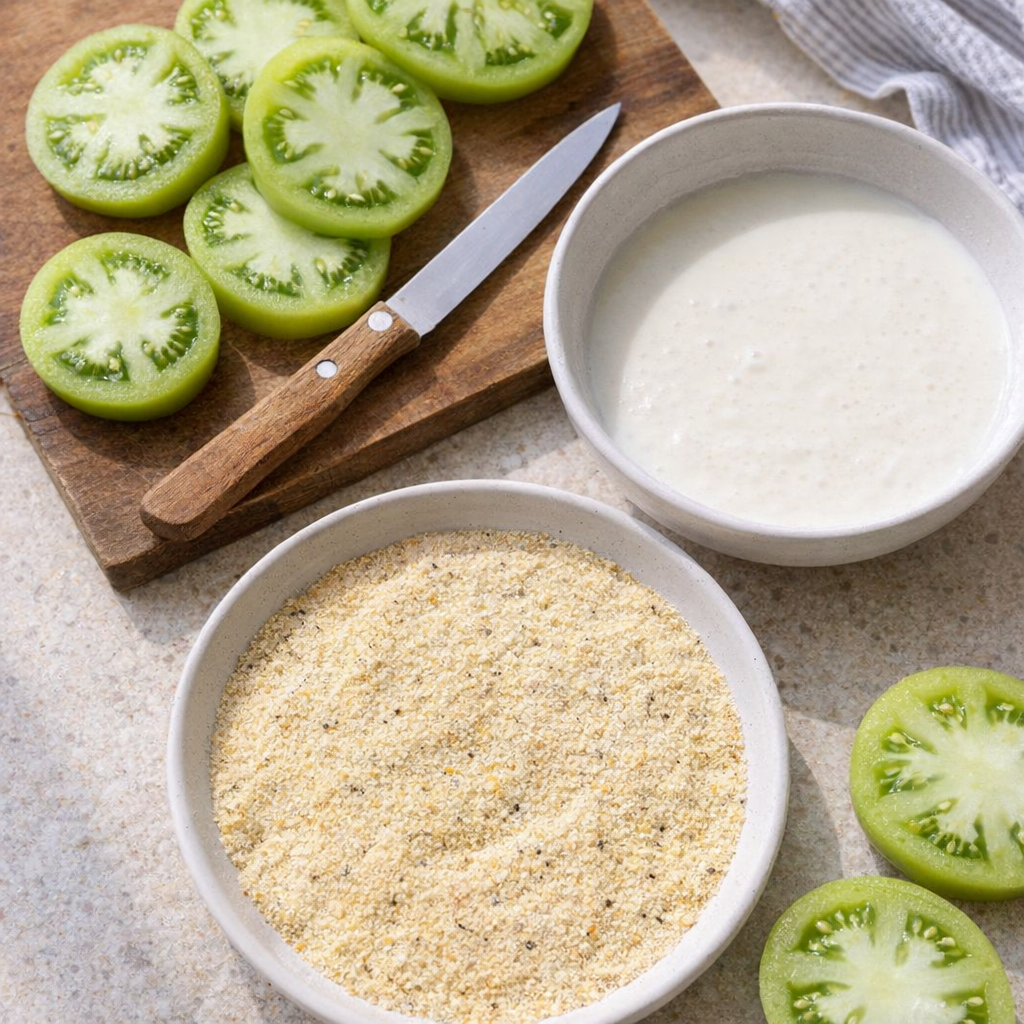
Fresh green tomatoes and cornmeal arranged for frying

Serve these fried green tomatoes hot, straight from the paper towel–lined plate while they’re still audibly crisp. I like them as a starter alongside other simple Southern-leaning bites—think boiled peanuts, deviled eggs, or a light salad with a tangy vinaigrette to echo the tomato’s brightness.

They’re also wonderful tucked into a BLT in place of the usual ripe tomato, or stacked on a burger for a crunchy, tart contrast. If you’d like a dip without adding ingredients to the recipe itself, use what you have on hand: ranch, remoulade, or even plain mayonnaise with a squeeze of lemon all work beautifully.

Southern 4-Ingredient Fried Green Tomatoes

Servings: 4


Ingredients

4 medium firm green tomatoes, sliced 1/4-inch thick

1 cup buttermilk
1 cup seasoned cornmeal (self-rising or pre-seasoned)
1 cup neutral frying oil (such as vegetable or canola), plus more as needed

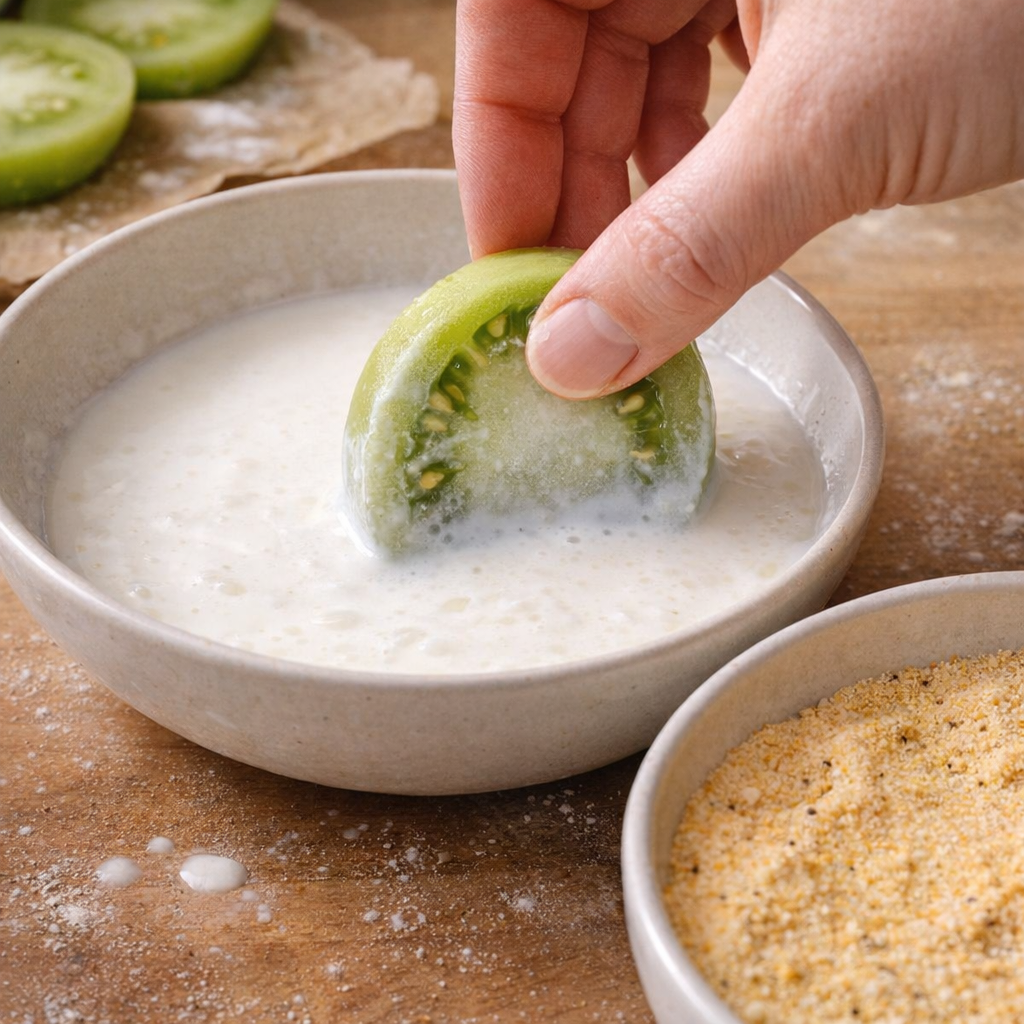
Tomato slices dipped in buttermilk before coating

Directions

Slice the green tomatoes into 1/4-inch-thick rounds. Discard the stem ends and lay the slices on a tray or cutting board. Pat them dry lightly with a paper towel so the coating adheres well.

Pour the buttermilk into a shallow bowl. In a separate shallow dish, add the seasoned cornmeal and spread it out in an even layer.

Working with a few tomato slices at a time, dip each slice into the buttermilk, turning to coat both sides and letting any excess drip back into the bowl.

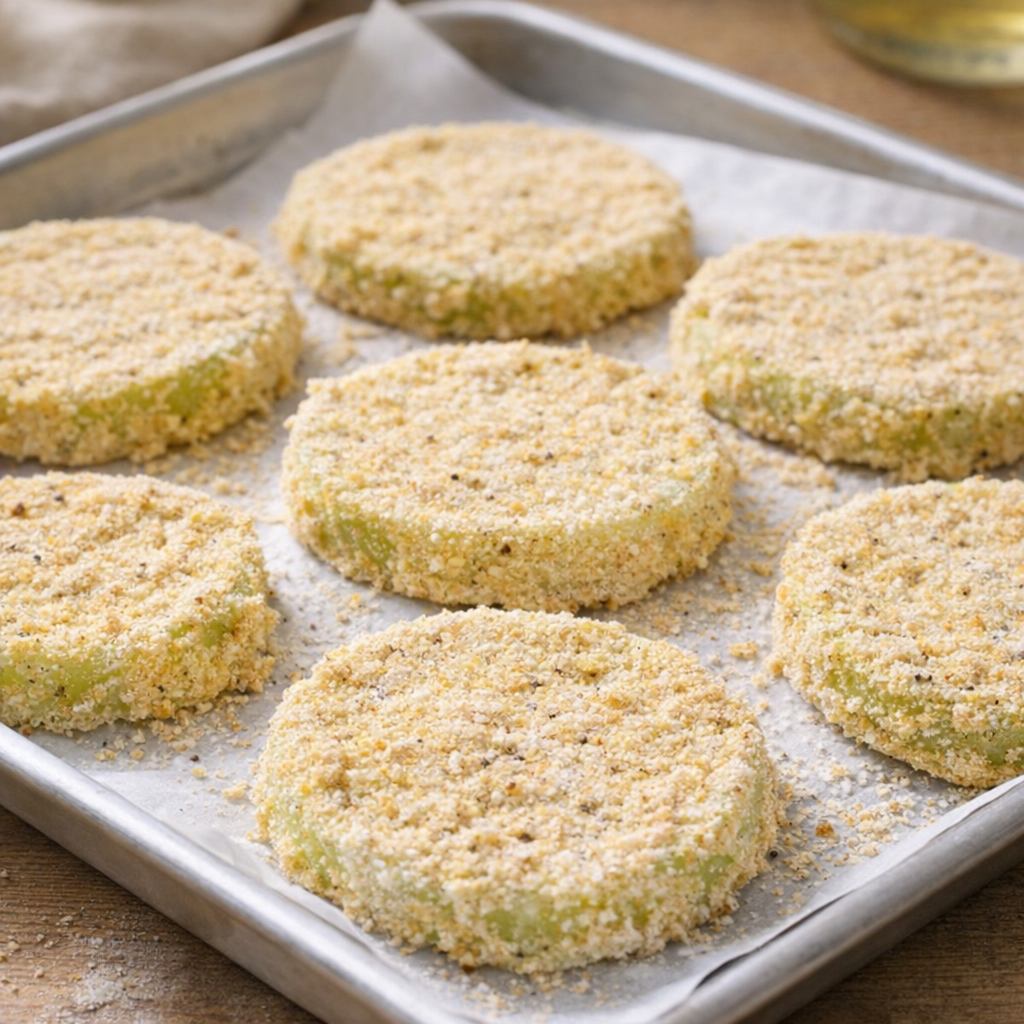
Transfer the buttermilk-coated slices to the cornmeal. Press gently on each side so the cornmeal clings in a thin, even layer. Set the coated slices on a plate or baking sheet while you finish the rest; this brief rest helps the crust stick and crisp.

Cornmeal-coated green tomato slices ready to fry

In a large, heavy skillet (cast iron is ideal), pour in the oil to a depth of about 1/4 inch. Heat over medium to medium-high heat until the oil shimmers and a pinch of cornmeal sizzles on contact, about 350°F if you’re checking with a thermometer.

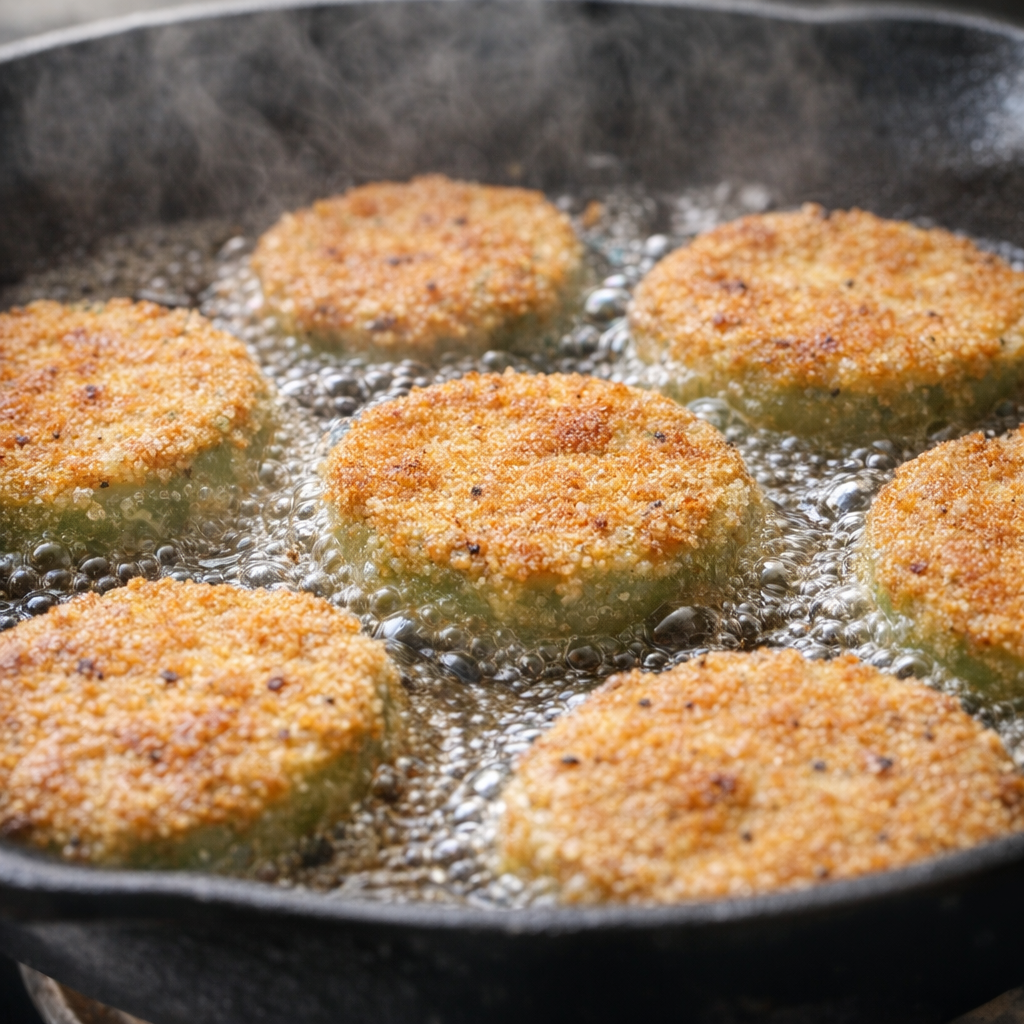
Carefully lay a single layer of coated tomato slices into the hot oil without crowding the pan. Fry for 2 to 3 minutes per side, or until the crust is deep golden brown and crisp and the tomato inside has just begun to soften.

Use tongs or a slotted spatula to transfer the fried green tomatoes to a paper towel–lined white plate to drain, keeping them in a single layer so the crust stays crunchy. Repeat with remaining slices, adding a bit more oil and reheating it between batches if needed.

Fried green tomatoes crisping in a cast-iron skillet

Serve the fried green tomatoes immediately while they’re hot and at their crispiest, passing any favorite dipping sauces at the table if you like.

Variations & Tips

Because this recipe is intentionally pared down to four ingredients, the variations are more about technique than adding new items to the list. For extra crunch, double-dip: after the initial buttermilk and cornmeal coating, return slices briefly to the buttermilk and then back into the cornmeal before frying, shaking off excess each time.

If your cornmeal isn’t pre-seasoned, you can still keep the four-ingredient spirit by choosing a self-rising, seasoned blend from the store; it typically contains salt and leavening that help with texture and flavor. To manage browning, adjust your heat as you go—if the crust darkens too quickly, lower the heat slightly so the tomato has time to soften inside without burning the outside.

For a slightly lighter texture, use medium- or fine-grind cornmeal; for a more rustic, assertive crunch, choose a coarse grind. Leftover fried green tomatoes can be reheated in a hot oven or toaster oven to revive the crust, and they’re excellent the next day layered into sandwiches or served on top of a simple bed of greens for a warm salad

Thursday, September 10, 2026

The Perfect Caramel Treat

by


🍯 Ingredients

2 cups flour

½ cup sugar

1 egg

½ cup melted butter

1 teaspoon baking powder

Vanilla

A pinch of salt

For the topping: ½ cup sugar + 2 tablespoons butter + 3 tablespoons milk

👩‍🍳 Short Preparation

Mix the egg, sugar, vanilla, and melted butter.

Add the flour, baking powder, and salt, and mix until you get a firm dough.

Spread the dough in a baking pan and bake at 180°C (350°F) until golden.

Melt the sugar with the butter and milk until you get a caramel sauce.

Pour the sauce over the dessert, let it cool, then cut it into squares. 😋


creamy lemon squares

by


Creamy Lemon Squares: A Delightful Treat for Every Occasion

When it comes to desserts, few things are as refreshing and satisfying as creamy lemon squares. These simple yet elegant treats are perfect for any gathering, whether it’s a spring picnic, summer barbecue, or winter holiday party. With a rich, tangy filling atop a buttery shortbread crust, creamy lemon squares are sure to impress your guests and tantalize their taste buds. In this article, we’ll explore the background, key ingredients, preparation steps, and even some tips for making these delectable desserts your own.

## The Origin of Lemon Squares

Lemon squares stem from classic lemon bars that have been enjoyed for generations. Believed to have originated in America during the 1960s, these sweet-tart desserts quickly became a popular choice for potlucks and family gatherings. Over time, the recipe has evolved, leading to the creation of creamy lemon squares, which offer a richer, smoother texture thanks to the addition of cream or condensed milk.

## Key Ingredients for Creamy Lemon Squares

To prepare creamy lemon squares at home, you will need the following high-quality ingredients:

### For the Crust:
– **Unsalted butter**: About one cup, softened. Unsalted butter will ensure that you can control the saltiness of the crust.
– **Granulated sugar**: Half a cup to sweeten up the buttery crust.
– **All-purpose flour**: One and a half cups. This will create a light and crumbly texture.
– **Salt**: Just a pinch to enhance the flavor.

### For the Filling:
– **Fresh lemon juice**: One cup. Freshly squeezed juice offers the most vibrant flavor.
– **Lemon zest**: Zest from two lemons. This adds an aromatic quality that elevates the overall taste.
– **Sweetened condensed milk**: One can (14 ounces). This ingredient brings creaminess and sweetness to the filling.
– **Eggs**: Two large, which bind the filling and provide richness.

### Optional Toppings:
– **Powdered sugar**: For dusting on top, providing a rustic and sweet finish.
– **Fresh berries**: To serve alongside, adding color and additional flavors.

## Step-by-Step Guide to Making Creamy Lemon Squares

Now that we have our ingredients ready, let’s walk through the process of making these delightful creamy lemon squares.

### Step 1: Prepare the Crust

1. **Preheat the Oven**: Preheat your oven to 350 degrees Fahrenheit (175 degrees Celsius).
2. **Mix the Butter and Sugar**: In a mixing bowl, combine the softened unsalted butter and granulated sugar. Use a hand mixer or stand mixer to beat them together until the mixture becomes light and fluffy.
3. **Add Flour and Salt**: Gradually add the all-purpose flour and a pinch of salt to the mixture. Stir until the ingredients are well combined and a dough forms.
4. **Press into the Baking Dish**: Grease an 8×8 inch baking dish and press the dough evenly into the bottom. Make sure it’s smooth and compact to create an even crust.
5. **Bake the Crust**: Bake in the preheated oven for 15 to 20 minutes, or until lightly golden. Once baked, remove it from the oven and let it cool slightly.

### Step 2: Make the Filling

1. **Combine Lemon Ingredients**: In a separate mixing bowl, whisk together the fresh lemon juice, lemon zest, sweetened condensed milk, and eggs until they are well combined and smooth.
2. **Pour Over the Crust**: Pour the lemon filling over the cooled crust, spreading it evenly with a spatula.

### Step 3: Bake Again

1. **Bake the Squares**: Return the baking dish to the oven and bake for an additional 20 to 25 minutes, or until the filling is set and the edges are slightly golden.
2. **Cool Completely**: After baking, remove the baking dish from the oven and let it cool at room temperature. For best results, refrigerate the lemon squares for at least two hours before cutting into squares. This helps set the filling and makes cutting easier.

### Step 4: Serve and Enjoy

1. **Cut into Squares**: Once chilled, use a sharp knife to cut the creamy lemon squares into desired sizes.
2. **Dust with Powdered Sugar**: For an added touch of sweetness and presentation, dust the squares with powdered sugar right before serving. You can also serve them with fresh berries on the side.

## Tips for the Perfect Creamy Lemon Squares

To make your creamy lemon squares even more memorable, consider the following tips:

– **Use Fresh Ingredients**: Whenever possible, use fresh lemons for the juicing and zesting process. This contributes to a more intense and vibrant flavor compared to bottled lemon juice.
– **Adjust Sweetness**: Depending on your taste preference, you can adjust the amount of sweetened condensed milk or even add a bit of granulated sugar to balance the tartness of the lemons.
– **Experiment with Flavors**: Feel free to add other elements like vanilla extract or even a hint of almond extract to the filling for a unique flavor twist.

## Conclusion

Creamy lemon squares are an irresistible treat that combines the perfect balance of sweet and tart flavors along with a rich, creamy texture. Whether you are hosting a gathering or simply treating yourself to a delightful dessert, these squares are sure to please. With some simple ingredients and easy preparation steps, you can create a batch of creamy lemon squares that will leave your family and friends craving more. So why not gather your ingredients today and bring a taste of sunshine into your kitchen? Enjoy this delicious treat all year round!

Dolly’s Famous 5-Ingredient Stampede Hashbrown Casserole

by


Why You’ll Love This Recipe

  • Effortless Prep: No dicing, sautéing, or complex prep steps required—just mix, spread, and bake.
  • Potluck & Holiday Perfection: Feeds a crowd easily and pairs seamlessly with roast chicken, holiday ham, ribs, or breakfast spreads.
  • Foolproof Texture: Frozen hashbrowns soak up the creamy cheese mixture, resulting in a tender center beneath a crispy browned top.

Recipe Overview

DetailTime / Yield
Prep Time5 minutes
Cook Time45–50 minutes
Total Time55 minutes
Servings8–10 servings
Baking Temp350°F (175°C)

Ingredients

  • 1 bag (30 oz) frozen shredded hashbrowns, thawed
  • 1 can (10.5 oz) condensed cream of chicken soup (or cream of cheddar)
  • 1 container (16 oz) sour cream
  • 2 cups sharp cheddar cheese, freshly shredded and divided (1.5 cups for filling, 0.5 cup for topping)
  • ½ cup (1 stick) unsalted butter, melted

(Optional pantry seasoning: ½ tsp garlic powder, salt, and black pepper to taste)

Step-by-Step Instructions

1. Prepare the Oven and Baking Dish Preheat your oven to 350°F (175°C). Lightly grease a standard 9×13-inch baking dish with non-stick spray or butter.

2. Mix the Cream Base In a large mixing bowl, combine the sour cream, condensed cream of chicken soup, and melted butter. Whisk until smooth and uniform. Stir in 1.5 cups of the shredded cheddar cheese.

3. Fold in the Hashbrowns Add the thawed shredded hashbrowns to the bowl. Gently fold with a rubber spatula until every shred is evenly coated in the creamy mixture.

4. Assemble and Top Spread the hashbrown mixture evenly into the prepared baking dish, smoothing out the surface. Sprinkle the remaining ½ cup of shredded cheddar evenly across the top.

5. Bake to Golden Perfection Bake uncovered for 45 to 50 minutes, or until the casserole is bubbling vigorously around the edges and the top is deeply golden-brown and crispy. Let it rest for 5 to 10 minutes before scooping and serving.

Baker’s Tips for the Best Result

  • Thaw the Potatoes: Make sure your shredded hashbrowns are completely thawed and lightly blotted with paper towels. Excess ice crystals will add water and dilute the creamy sauce.
  • Shred Your Own Cheese: Pre-bagged shredded cheese contains anti-caking starches that hinder smooth melting. Grating a block of sharp cheddar yields a richer sauce and a superior golden crust.
  • Crispy Topping Variation: If you prefer extra crunch, toss ½ cup of crushed buttery round crackers (like Ritz) or cornflakes with 2 tablespoons of melted butter and scatter over the top during the last 15 minutes of baking.

Storage & Reheating

  • Refrigerator: Store leftovers in an airtight container for up to 4 days.
  • Freezing: Assemble the casserole completely without baking, cover tightly with plastic wrap and aluminum foil, and freeze for up to 3 months. Thaw overnight in the refrigerator before baking as directed.
  • Reheating: Reheat individual portions in the microwave for 1–2 minutes, or warm the whole baking dish in a 325°F (165°C) oven until heated through and crisp on top.

My aunt makes this for every

by


These Southern 3-ingredient sausage balls are the definition of dangerously easy. My aunt has made them for every Sunday dinner since I was a kid, and they are always the first thing to disappear from the table. They’re a classic Southern party snack: just breakfast sausage, shredded cheddar, and baking mix rolled into bite-sized balls and baked until the edges are golden and crispy with little pockets of melted cheese. No chilling, no fancy equipment, and they’re perfect for busy weekends, game days, or whenever you need something everyone will grab without hesitation.
Plate of golden sausage balls on a kitchen counter
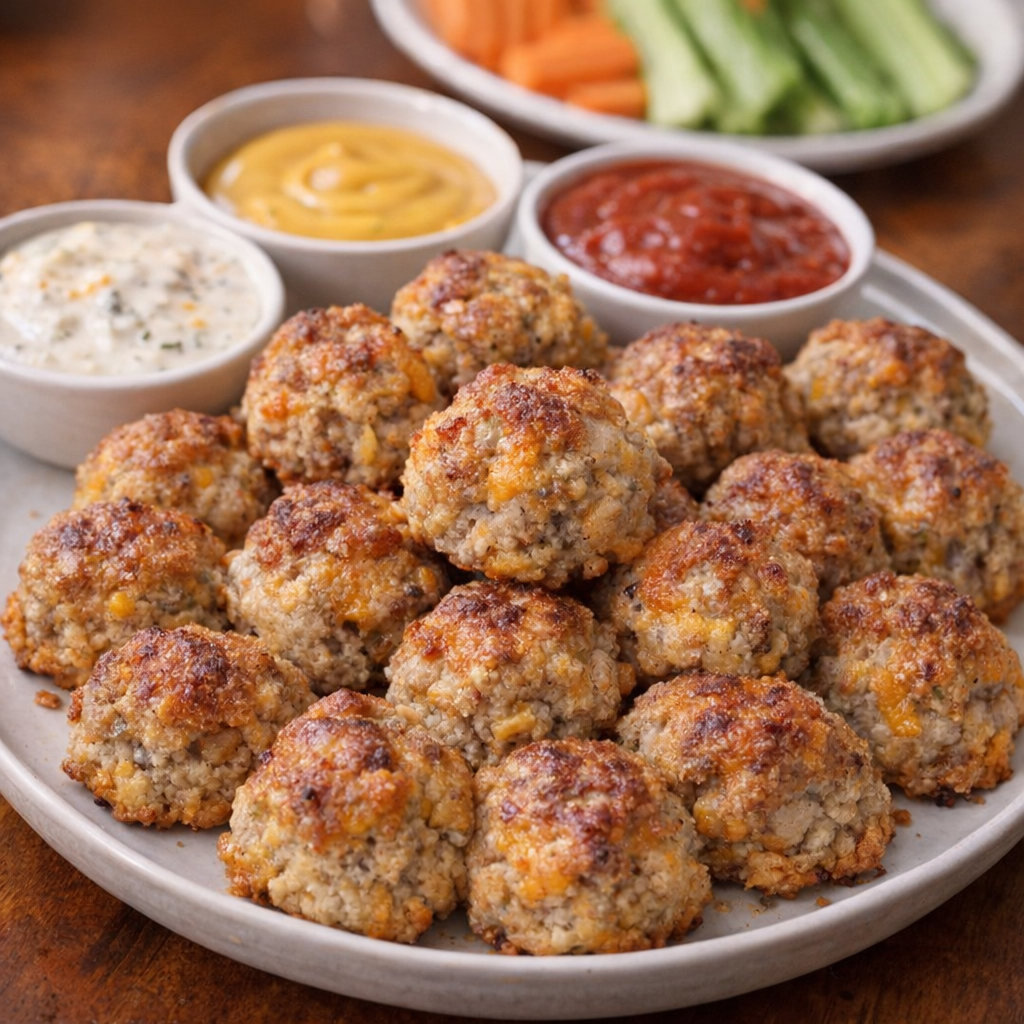
Serve these sausage balls warm on a simple white plate or platter with toothpicks for easy grabbing. They’re great alongside a big salad, scrambled eggs, or fruit for a casual brunch, or next to other finger foods like veggie sticks and chips for game night. If you want to add a dip, ranch, honey mustard, or a spicy ketchup all work really well, but they’re flavorful enough to eat plain. They also travel well, so they’re a solid option for potlucks, office parties, or any Sunday dinner where you need a guaranteed crowd-pleaser.
Southern 3-Ingredient Sausage Balls
Servings: 24 sausage balls (about 6–8 servings as an appetizer)

Ingredients
1 pound (16 oz) raw pork breakfast sausage, mild or hot
2 cups (about 8 oz) shredded sharp cheddar cheese, packed
2 cups (about 8.5 oz) biscuit baking mix (such as Bisquick)
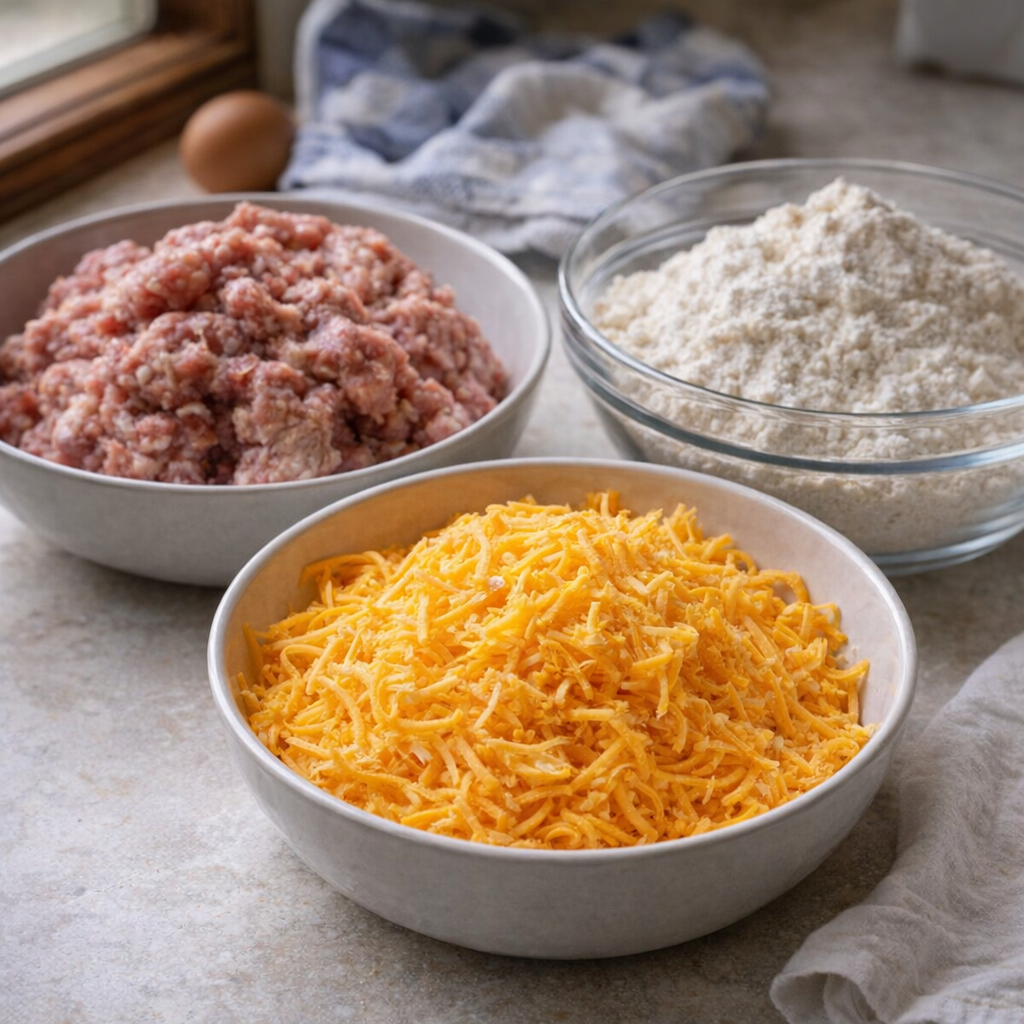
Measured sausage, cheddar, and baking mix in prep bowls
Directions
Preheat your oven to 350°F (175°C). Line a large baking sheet with parchment paper or lightly grease it to prevent sticking.
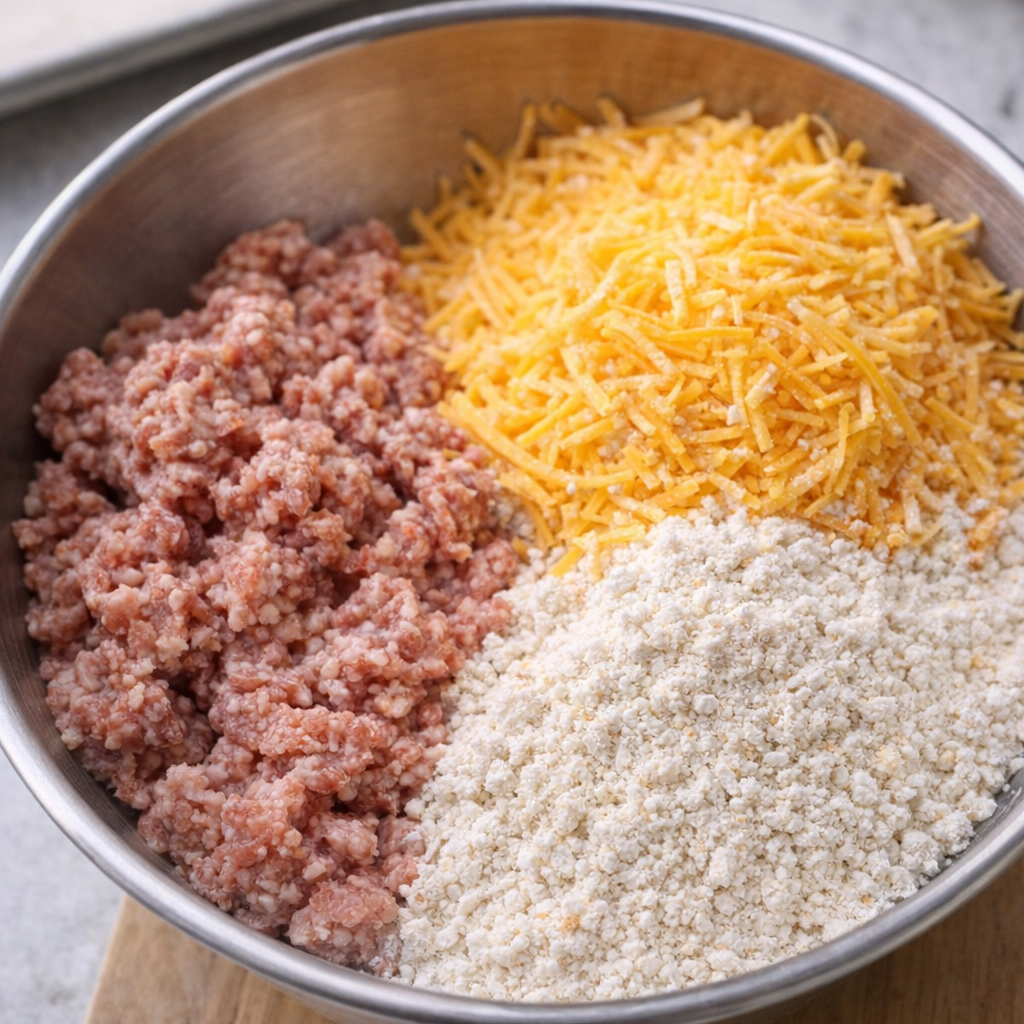
In a large mixing bowl, add the raw pork breakfast sausage, shredded sharp cheddar cheese, and biscuit baking mix.
Mixing bowl with sausage, cheddar, and baking mix before stirring
Use your hands to mix everything together until the sausage, cheese, and baking mix are fully combined and no dry pockets of mix remain. This takes a few minutes of kneading; the mixture will be thick and slightly sticky.
Pinch off portions of the mixture and roll into tight, smooth balls about 1 to 1 1/4 inches in diameter (roughly 1 tablespoon each). Place them on the prepared baking sheet, spacing them about 1 inch apart so they can brown evenly.
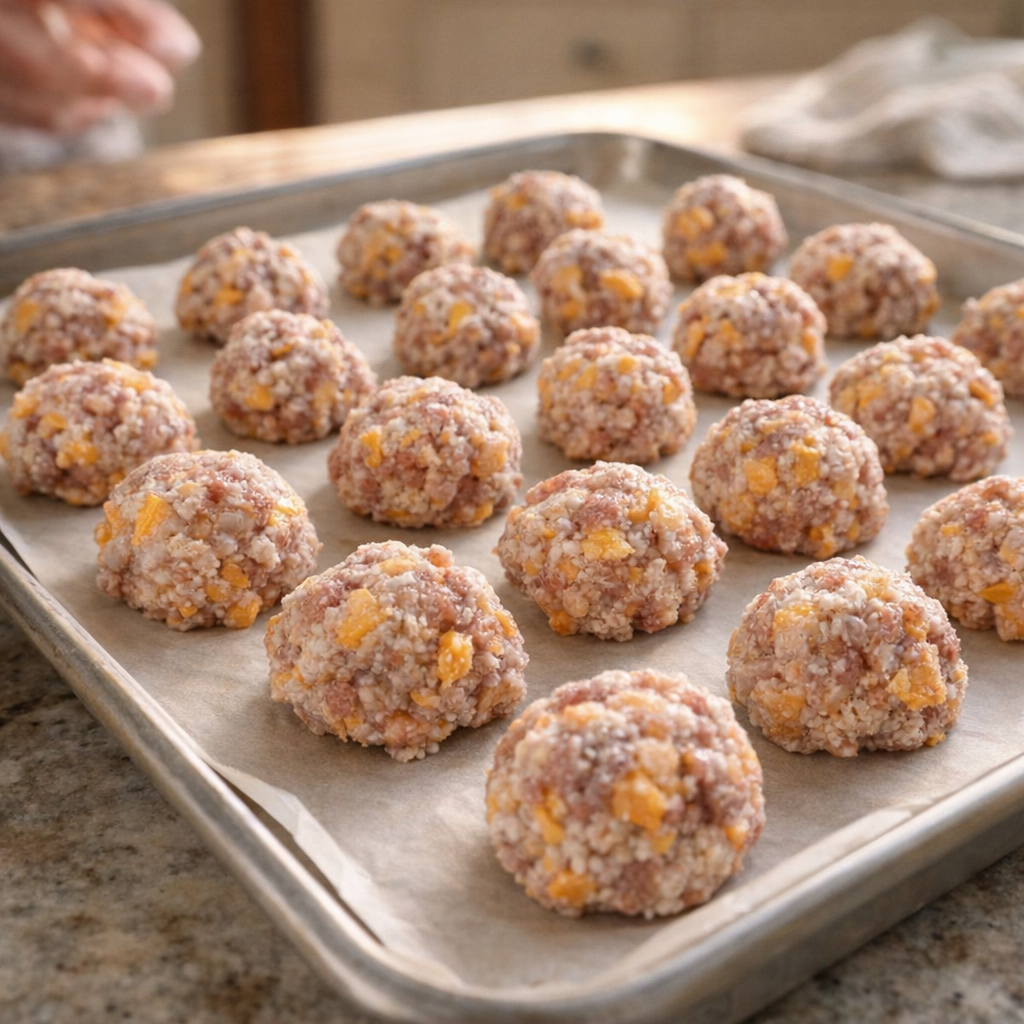
Unbaked sausage balls lined up on a parchment-covered sheet pan
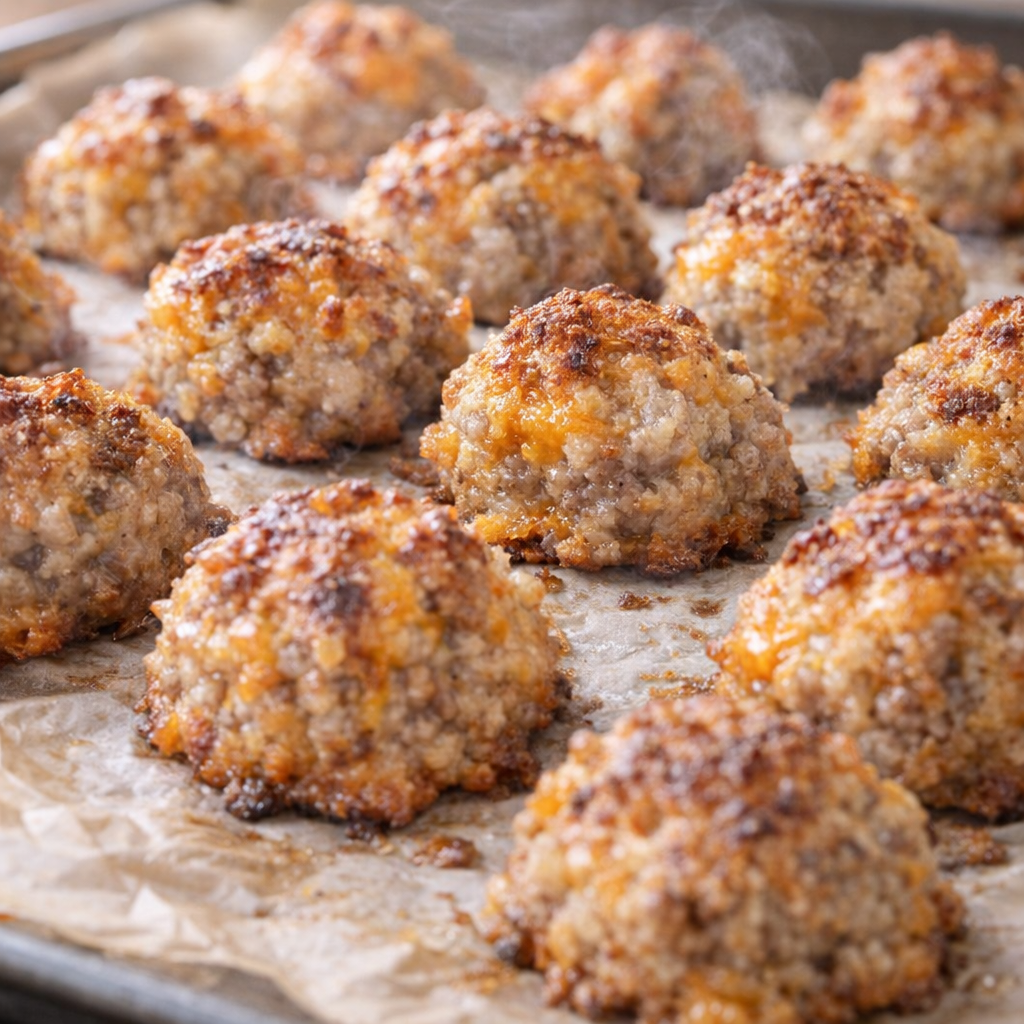
Once all the sausage balls are rolled and on the sheet, bake in the preheated oven for 18–22 minutes, or until they are cooked through and the edges are golden brown with little spots of melted cheddar visible.
Remove the baking sheet from the oven and let the sausage balls cool on the pan for about 5 minutes to firm up slightly. Transfer to a serving plate and serve warm.
Freshly baked sausage balls cooling on the pan
If making ahead, let the baked sausage balls cool completely, then store in an airtight container in the refrigerator for up to 3 days. Reheat on a baking sheet at 325°F (165°C) for 8–10 minutes, or until warmed through and edges are crisp again.
Variations & Tips
Use hot breakfast sausage instead of mild if your crowd likes a little kick, or do half mild and half hot for a balanced heat. For extra cheesy sausage balls, bump the cheddar up to 2 1/2 cups and pack it in firmly when measuring.

If your mixture feels too dry and crumbly to roll, work in 1–2 tablespoons of milk, a little at a time, until it holds together; if it feels too soft, sprinkle in another tablespoon or two of baking mix.

Sausage balls served with dipping sauces for a casual gathering

You can swap sharp cheddar for extra-sharp or a cheddar-jack blend, but stick with a cheese that melts well. For make-ahead prep, roll the sausage balls and freeze them raw on a baking sheet until solid, then transfer to a freezer bag; bake from frozen at 350°F, adding 3–5 extra minutes to the bake time. To keep them warm for a longer gathering, place baked sausage balls in a slow cooker on the warm setting with a clean kitchen towel under the lid to catch condensation so they stay crisp on the outside.

Orange Creamsicle Chia Seed Pudding

by


Ingredients

  • 1 ¼ cups unsweetened coconut milk: for ultimate creaminess.
  • ¼ cup Chia Seeds: Black or white seeds work equally well.
  • 1 large Naval Orange: You will need both the zest (approx. ¼ tsp) and the juice/segments.
  • 1 tsp Honey or Maple Syrup: Optional, adjust based on the sweetness of your orange.
  • ⅛ tsp Vanilla Extract: For that classic “creamsicle” flavor profile.

Instructions

  1. Prepare the Base:
     
     In a medium bowl or large mason jar, whisk together the coconut milk, vanilla extract, and your chosen sweetener until well combined.
  2. Incorporate the Citrus: Grate approximately ¼ teaspoon of orange zest into the mixture. If you prefer a smoother texture, you can puree the orange segments with the milk in a blender first.
  3. Add the Seeds: Stir in the chia seeds.
  4. The Two-Stir Method: This is crucial to prevent clumping. Let the mixture sit for 5–10 minutes, then give it a second vigorous stir or shake to ensure the seeds are evenly distributed as they begin to gel.
  5. Refrigerate: Cover the container tightly and refrigerate for at least 4 hours, though overnight is best for a thick, pudding-like consistency.
  6. Serve: Before eating, give the pudding one final stir. Top with fresh orange segments, extra zest, or a few crushed nuts for crunch.

Why It Works for Beginners

  • High Fiber & Protein: Chia seeds are “powerhouse” ingredients packed with omega-3 fatty acids and fiber, which help keep you full and support heart health.
  • Meal Prep Friendly: You can store this in an airtight container in the fridge for up to 5 days, making it an easy grab-and-go option for busy mornings.
  • Customizable: If the pudding is too thick for your liking after setting, simply stir in a splash of extra milk to reach your desired consistency.


Top Ad 728x90